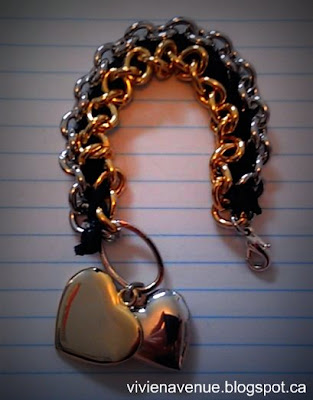
DIY: Rousseau Chain Bracelet
How do you like to study?
I love rose gold coloured jewelry the best but I also really enjoy silver and gold jewelry. Yet I never understood why silver and gold jewelry should not be worn together. It's like that rule about not wearing white after Labour Day or not wearing brown and black together. Some "rules" should be broken like Chriselle said.
I'm going to show you how I clashed silver and gold together into one bracelet.
I was supposed to be studying for my political theory course exam but ended up making this bracelet instead. I blended studying and this DIY project together. Where I got the inspiration from?
As Jean-Jacques Rousseau said, "Man is born free and everywhere he is in chains."
Get it? Chain bracelet, and chains on liberty. Ok lame I know :)
Let's get started!
Materials:
- 1 silver chain
- 1 gold chain
- 1 piece of 30 cm long ribbon
- 1 lobster clasp and circle ring
- assorted charms (optional)
- tape (optional)
1. Measure and cut the two chains to your wrist circumference. Hold the first holes of the chains into a circle ring (see box 6 for a clearer picture). I inserted circle ring into a hook and then secured the hook to a clip board for maximum hold.
2. Wrap the ends of your ribbon in tape so it looks like a shoelace. This will prevent fraying and make it much easier for you to loop in and out of the chains.
3. Loop the ribbon through the first hole on both chains.
4. Cross the right strand of the ribbon over the left strand.
5. Insert the end of the right strand ribbon into the third loop on the left chain.
6. Insert the end of the left strand ribbon into the third loop on the right chain.
You should get an X shape like in the photo. Keep repeating steps 5 and 6 until you reach the end. Remember to pull the ribbon firmly to bring the two chains together and to be consistent between alternating left strand and right strand. It might look confusing but just keep inserting the ribbon into every other chain hole and it will start to turn out nice!
7. You've reached the end!
8. Now insert a circle ring (yes I know mine is oblong not circle) to hold the two ends of the chain together. My silver chain was longer than the gold one so I had to pry it off. These chains are much more durable than I thought! Had to use strong pryers to get the job done.
9. I added two heart charms into the circle ring for decoration before I closed the ring.
10. Add a lobster clasp to the first circle ring (the one secured by the clipboard). Tie a knot with the excess ribbon and snip off the ends. Use strong glue to glue the knot tight so it will not unravel.
Success!
Here's how the bracelet looks paired with my favourite bracelet. These Italian charm bracelets used to be so popular but they're nowhere to be found in Vancouver malls anymore :( I want to add charms to mine but can't find any stores that sell them.
Two looks in one :)
 |
| Chain side |
 |
| Ribbon side |


0 comments: